Dear Jess,
This is a new staple recipe for future potlucks, baby showers, bridal showers, tea times... any time...
While at Mary Austin's house, visiting before her Pampered Chef party, she showed me a cookbook she signed out from the library. Jerusalem: A Cookbook by Yotam Ottolenghi and Sami Tamimi. I am seriously considering buying this beautiful book. It is so well laid out, and the photos are gorgeous. It makes you want to eat every single dish in you see in this book.
Since I offered to bring a dip with veggies and/or crackers for a baby shower that was coming up, I decided to copy this recipe from the book. I don't have the page number with me, but if you buy the book, it will be in there... I promise!
I don't think I was expecting this to be anything special. I thought it would be yummy, but a 'whatever-I'll-make-it-this-one-time' recipe. This is one situation where I am always glad to be entirely wrong! This spread is sweet, with a thick texture. It was delicious on sesame rice crackers, but would also be amazing as a spread on a sandwich or wrap!
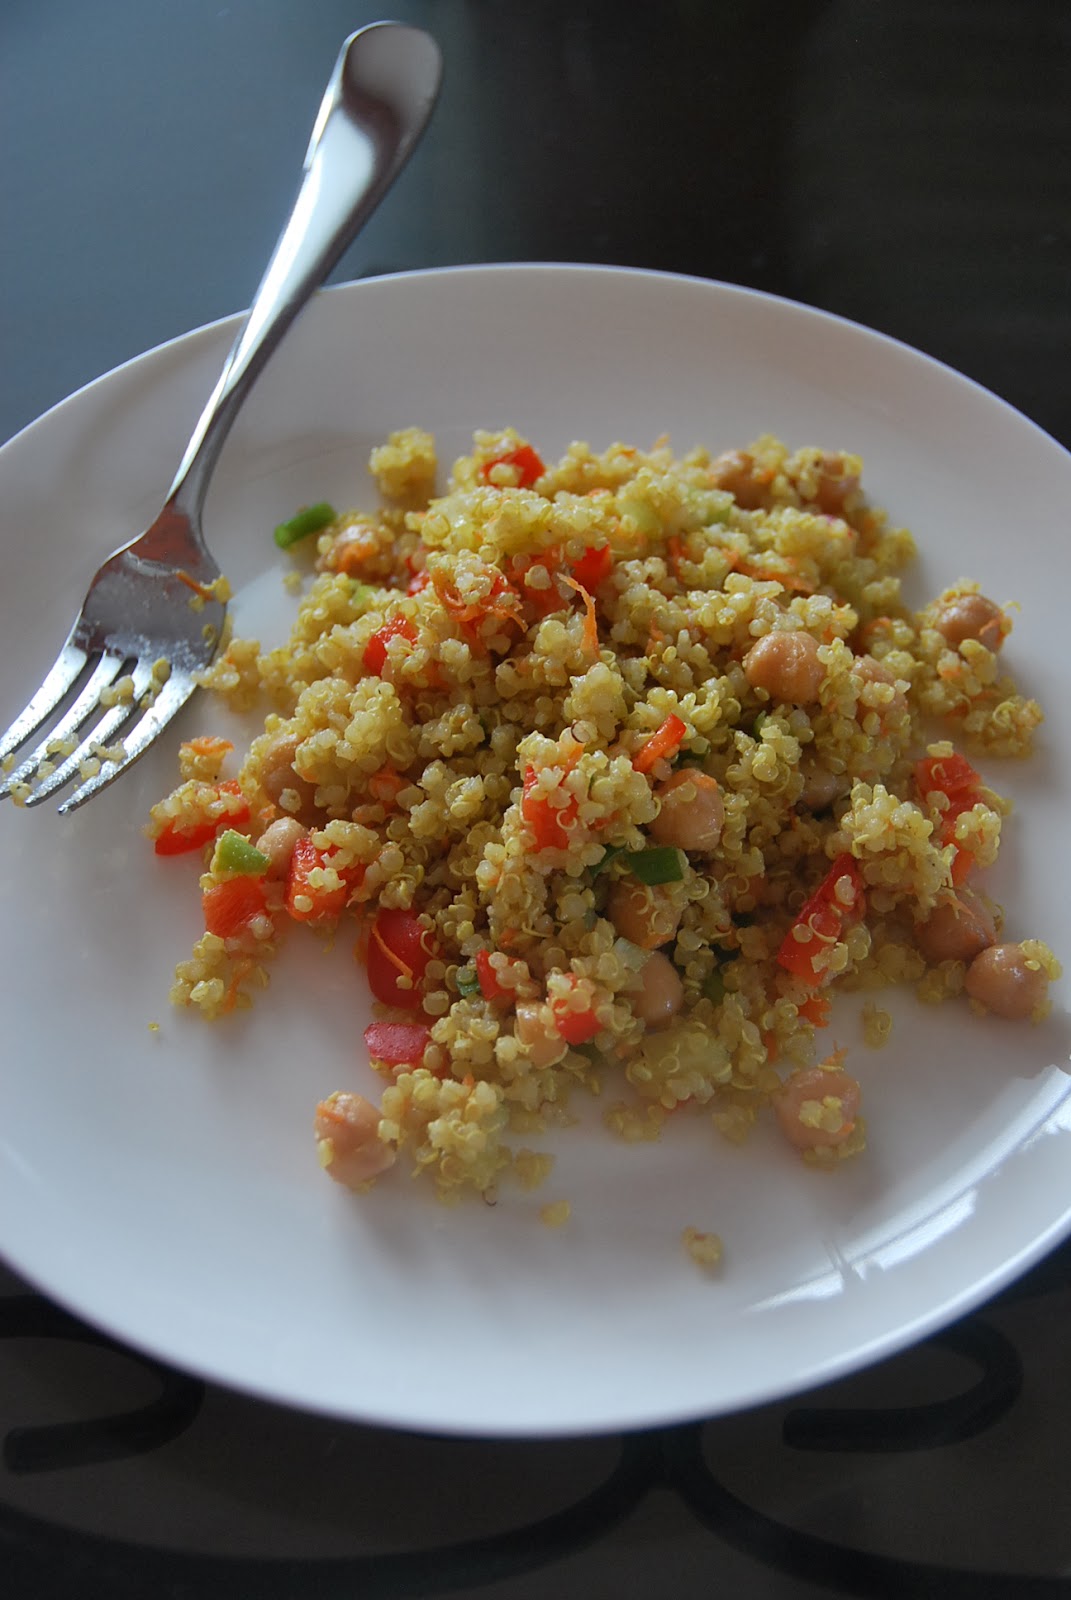
Also, this makes a LOT of spread. The picture shows about a third of the amount, and I put it on my large dinner plate! But not to worry! It keeps well in the fridge!
Butternut Squash and Tahini Spread
from Jerusalem: A Cookbook by Yotam Ottolenghi and Sami Tamimi
1 very large butternut squash (about 2 1/2lb), peeled and cut into chunks (about 7 cups in total)
3 Tbsp olive oil
1 tsp ground cinnamon
5 Tbsp light Tahiti paste
1/2 cup Greek yogurt
2 small cloves garlic, crushed
1 tsp mixed black and white sesame seeds (or just white, if you don't have black)
1 1/2 tsp date syrup (or maple syrup or molasses)
salt
Preheat the oven to 400F/200C
Spread the squash out in a medium roasting pan. Pour over the olive oil and sprinkle on the cinnamon and 1/2 tsp salt. Mix together well, cover the pan tightly with aluminum foil, and roast in the oven for 70 minutes, stirring once during the cooking. Remove from the oven and leave to cool.
Transfer the squash to a food processor, along with the Tahiti, yogurt, and garlic. Roughly pulse so that everything is combined into a coarse paste, without the spread becoming smooth; you can also do this by hand using a fork or potato masher.
Spread the butternut in a wavy pattern over a flat plate and sprinkle with the sesame seeds, drizzle over the syrup, and finish with the cilantro, if using.
I really do hope you get a chance to make this! The flavours and textures all have a party in your mouth with every bite! Mmmmmmmm... I need to make this again... and soon!
Love,
Showing posts with label snack. Show all posts
Tuesday, March 10, 2015
Monday, April 1, 2013
Bacon Appetizers and Muffin Sized Lasagna
Good Morning, and Happy Easter Monday!
I hope your weekend was wonderful, and you were able to get outside and enjoy the beautiful Spring weather! It was snowing a little bit this morning (in typical April style), but the sun has now come out and it's looking like a cheerful day!
We celebrated my Mom's birthday this weekend, and Jason and I had the whole family over for dinner. Including significant others... this was a total of 10 people! We set up our living room with our 2 tables and had a lovely time!
Kristy came over to help me (which was awesome!) and the night was a success (company, food, atmosphere... everything!)
I will be sharing two of these recipes with you today.
Bacon wrapped Dates
from Caitlin, who made them for Jason and me the last time we visited
Pitted Dates
Bacon, cut in half
Goat Cheese
Almonds
Toothpicks (sturdy ones)
1. Place one almond and a chunk of Goat cheese inside the date. Wrap in half a piece of bacon. Stab with a toothpick. Pace in a greased casserole dish.
2. Bake at 400F for 15-20 minutes. Let cool for 5 minutes.
3. Serve.
Always make more than you think you will need! Though they sound weird... they are so delicious!
Muffin Sized Lasagna
adapted from tablespoon.com
1/3 pound extra lean ground beef
salt and pepper
24 wonton wrappers
1 3/4 cup (7oz) freshly grated Parmesan Cheese
1 3/4 cup (7oz) grated Mozzarella Cheese (I used marbled)
3/4 cup (3oz) Ricotta Cheese
1 cup Pasta Sauce
Fresh Basil for Garnish (optional)
1. Preheat oven to 375F. DO NOT spray muffin trays!
2. Brown beef, and season with salt and pepper. (I added seasonings to my beef.) Drain.
3. Reserve 3/4 cup Parmesan Cheese and 3/4 cup mozzarella cheese for the top of your lasagnas. Start layering your lasagna. Begin with a wonton wrapper and press it into the bottom of each muffin tin. Sprinkle a little Parmesan cheese, ricotta cheese, and mozzarella cheese in each. top with a little meat and pasta sauce.
4. Repeat layers again (i.e. wonton, Parmesan, ricotta, mozzarella, and pasta sauce). Top with reserved Parmesan and mozzarella cheeses.
5. Bake for 18-20 minutes or until edges are brown. Remove from oven and let cool for 5 minutes. To remove, use a knife to loosen the edges then pop each lasagna out.
6. Garnish with basil and serve.
I hope your weekend was wonderful, and you were able to get outside and enjoy the beautiful Spring weather! It was snowing a little bit this morning (in typical April style), but the sun has now come out and it's looking like a cheerful day!
We celebrated my Mom's birthday this weekend, and Jason and I had the whole family over for dinner. Including significant others... this was a total of 10 people! We set up our living room with our 2 tables and had a lovely time!
Kristy came over to help me (which was awesome!) and the night was a success (company, food, atmosphere... everything!)
The Menu:
Bacon wrapped Dates
Hummus and Flatbread (homemade)
Arugala, Mango and Avocado Salad
Bussels Sprout, Parmesan and Toasted Walnut Salad
Muffin Sized Lasagna
Coconut and Dark Chocolate Cups
Baked Apple Halves
I will be sharing two of these recipes with you today.
Bacon wrapped Dates
from Caitlin, who made them for Jason and me the last time we visited
Pitted Dates
Bacon, cut in half
Goat Cheese
Almonds
Toothpicks (sturdy ones)
1. Place one almond and a chunk of Goat cheese inside the date. Wrap in half a piece of bacon. Stab with a toothpick. Pace in a greased casserole dish.
2. Bake at 400F for 15-20 minutes. Let cool for 5 minutes.
3. Serve.
Always make more than you think you will need! Though they sound weird... they are so delicious!
Muffin Sized Lasagna
adapted from tablespoon.com
1/3 pound extra lean ground beef
salt and pepper
24 wonton wrappers
1 3/4 cup (7oz) freshly grated Parmesan Cheese
1 3/4 cup (7oz) grated Mozzarella Cheese (I used marbled)
3/4 cup (3oz) Ricotta Cheese
1 cup Pasta Sauce
Fresh Basil for Garnish (optional)
1. Preheat oven to 375F. DO NOT spray muffin trays!
2. Brown beef, and season with salt and pepper. (I added seasonings to my beef.) Drain.
3. Reserve 3/4 cup Parmesan Cheese and 3/4 cup mozzarella cheese for the top of your lasagnas. Start layering your lasagna. Begin with a wonton wrapper and press it into the bottom of each muffin tin. Sprinkle a little Parmesan cheese, ricotta cheese, and mozzarella cheese in each. top with a little meat and pasta sauce.
4. Repeat layers again (i.e. wonton, Parmesan, ricotta, mozzarella, and pasta sauce). Top with reserved Parmesan and mozzarella cheeses.
5. Bake for 18-20 minutes or until edges are brown. Remove from oven and let cool for 5 minutes. To remove, use a knife to loosen the edges then pop each lasagna out.
6. Garnish with basil and serve.
These are so yummy and so easy to adapt to individual tastes! This recipe makes 12... Kristy and I made 48. Half of the meat we seasoned with Thyme, Basil and Oregano. The other half we used Chili Powder, Cumin and Red Pepper flakes. They taste amazing the next day as well! Very good recipe to have!
Lots of Love,
Labels:
appetizers,
bacon,
beef,
cheese,
comfort food,
goat cheese,
simple,
snack
Friday, December 21, 2012
Hot Roasted Artichoke Dip with Spinach and Asiago Cheese with Herbed Pita Chips
Dear Jess,
Oh man. Christmas is fast approaching, and the 'party food' lists are being completed.
Last night my cousin Mark came for a visit. He is visiting from Alberta until Christmas. Last time he visited I completely ran out of time, and couldn't get together anything worth serving. The chips were stale, the coffee was week, I had to ask someone to pick up veggie dip for the few veggies I had in my fridge... It wasn't tasty. It wasn't pretty. Basically, it was something from my nightmares. I decided to do a 're-do'.
This time I had a beautiful, large veggie tray with dip, some chocolate dipped pretzels, and this artichoke dip with pita crisps that I seasoned and made crispy in the oven. We demolished everything! It was so delicious! And just for the record, I had fresh ground non-weak coffee, tea, eggnog, beer, wine and juice to serve for beverages. I think I redeemed myself.
I have decided to pay closer attention to my 'kitchen inventory' these days. It is forcing me to take into account what I already have, and try to find recipes that include said items. This Artichoke Dip is a result of this searching. I had a can of artichokes left over from some other recipe I tried quite a while ago. Needless to say, I'm glad I did! As mentioned before, we demolished this dip! And this is saying something, because this recipe makes a fair amount of it!
Hot Roasted Artichoke Dip with Spinach & Asiago Cheese
from The Looneyspoons Collections by Janet and Greta Podleski, Hearty-Choke Dip, Page 4
1 can (14oz/398mL) artichoke hearts (not marinated)
1/2 large yellow sweet onion, coarsely chopped
3 large cloves garlic, peeled and cut into thirds
1 tbsp olive oil
Salt and freshly ground black pepper to taste
1 can (19oz/540mL) no-salt-added white kidney beans, drained and rinsed
1 cup light (5%) sour cream (I used Fat Free)
1 tub (8oz/250mL) light garden vegetable cream cheese (such as Philadelphia brand)
1/2 tsp grated lemon zest
4 or 5 dashes hot pepper sauce
1/2 pkg (10 oz/300g) frozen spinach, thawed, squeezed dry and chopped (I used the whole 10 oz package. I love spinach!)
1 cup packed shredded Asiago cheese, divided (You can use Parmesan or Romano cheese instead. I used a combination of the three.)
1. Preheat oven to 425F
2. Drain artichokes and pat dry using paper towels. Cut artichokes in half. Place artichokes in a small casserole dish or baking pan. Add chopped onions and garlic. Drizzle with olive oil and sprinkle lightly with salt and pepper. Mix well. Roast uncovered for 30 minutes, stirring once, halfway through roasting time.
3. While vegetables are roasting, place kidney beans, sour cream, cream cheese, lemon zest and hot pepper sauce in the bowl of a food processor*. Whirl until smooth.
4. Remove artichoke mixture from oven. Reduce oven temperature to 375F. Let vegetables cool for 5 minutes, then add to ingredients in food processor. Pulse on and off until mixture is well blended but still slightly lumpy. Transfer artichoke mixture to a bowl and stir in spinach, a pinch of black pepper and all but 2 tbsp Asiago cheese. Spoon mixture back into casserole dish. Top with remaining 2 tbsp asiago cheese.
5. Bake uncovered on middle oven rack for 30 minutes, until mixture bubbles around the edges and top turns a light golden brown. Remove from oven and let cool for 5 minutes before serving. It's hot! Serve with whole-grain pita chips or crackers.
*I don't have a food processor, so I just used my blender.
Pita Chips
adapted from allrecipes.com
4-5 whole wheat pita breads
1/2 cup olive oil
1/2 tsp fresh ground black pepper
1 tsp garlic powder
1/2 tsp dried basil
1 tsp dried parsley
1. Preheat oven to 400F.
2. Cut all pita bread into whatever sizes/shapes you want your chips to be. Place them on a lined cookie sheet.
3. In a small bowl combine the remaining ingredients and mix well. Brush each pita piece with oil mixture.
4. Bake for 5-7 minutes, or until lightly golden and crispy. Watch carefully, as they brown easily!
I prepared the dip the day before (minus baking it.) Because of this, it was colder from being in the fridge over night, so I baked it for an extra 10 or 15 minutes. It still turned out amazing!
The chips were really yummy. The herbed seasoning was not very strong. They had a nice and subtle taste to them, and made the house smell delicious.
I hope you're not too busy, and you are finding time to relax during your holidays. I miss you and am really excited to see you again (hopefully soon!)
Love,
Oh man. Christmas is fast approaching, and the 'party food' lists are being completed.
Last night my cousin Mark came for a visit. He is visiting from Alberta until Christmas. Last time he visited I completely ran out of time, and couldn't get together anything worth serving. The chips were stale, the coffee was week, I had to ask someone to pick up veggie dip for the few veggies I had in my fridge... It wasn't tasty. It wasn't pretty. Basically, it was something from my nightmares. I decided to do a 're-do'.
This time I had a beautiful, large veggie tray with dip, some chocolate dipped pretzels, and this artichoke dip with pita crisps that I seasoned and made crispy in the oven. We demolished everything! It was so delicious! And just for the record, I had fresh ground non-weak coffee, tea, eggnog, beer, wine and juice to serve for beverages. I think I redeemed myself.
I have decided to pay closer attention to my 'kitchen inventory' these days. It is forcing me to take into account what I already have, and try to find recipes that include said items. This Artichoke Dip is a result of this searching. I had a can of artichokes left over from some other recipe I tried quite a while ago. Needless to say, I'm glad I did! As mentioned before, we demolished this dip! And this is saying something, because this recipe makes a fair amount of it!
Hot Roasted Artichoke Dip with Spinach & Asiago Cheese
from The Looneyspoons Collections by Janet and Greta Podleski, Hearty-Choke Dip, Page 4
1 can (14oz/398mL) artichoke hearts (not marinated)
1/2 large yellow sweet onion, coarsely chopped
3 large cloves garlic, peeled and cut into thirds
1 tbsp olive oil
Salt and freshly ground black pepper to taste
1 can (19oz/540mL) no-salt-added white kidney beans, drained and rinsed
1 cup light (5%) sour cream (I used Fat Free)
1 tub (8oz/250mL) light garden vegetable cream cheese (such as Philadelphia brand)
1/2 tsp grated lemon zest
4 or 5 dashes hot pepper sauce
1/2 pkg (10 oz/300g) frozen spinach, thawed, squeezed dry and chopped (I used the whole 10 oz package. I love spinach!)
1 cup packed shredded Asiago cheese, divided (You can use Parmesan or Romano cheese instead. I used a combination of the three.)
1. Preheat oven to 425F
2. Drain artichokes and pat dry using paper towels. Cut artichokes in half. Place artichokes in a small casserole dish or baking pan. Add chopped onions and garlic. Drizzle with olive oil and sprinkle lightly with salt and pepper. Mix well. Roast uncovered for 30 minutes, stirring once, halfway through roasting time.
3. While vegetables are roasting, place kidney beans, sour cream, cream cheese, lemon zest and hot pepper sauce in the bowl of a food processor*. Whirl until smooth.
4. Remove artichoke mixture from oven. Reduce oven temperature to 375F. Let vegetables cool for 5 minutes, then add to ingredients in food processor. Pulse on and off until mixture is well blended but still slightly lumpy. Transfer artichoke mixture to a bowl and stir in spinach, a pinch of black pepper and all but 2 tbsp Asiago cheese. Spoon mixture back into casserole dish. Top with remaining 2 tbsp asiago cheese.
5. Bake uncovered on middle oven rack for 30 minutes, until mixture bubbles around the edges and top turns a light golden brown. Remove from oven and let cool for 5 minutes before serving. It's hot! Serve with whole-grain pita chips or crackers.
*I don't have a food processor, so I just used my blender.
Pita Chips
adapted from allrecipes.com
4-5 whole wheat pita breads
1/2 cup olive oil
1/2 tsp fresh ground black pepper
1 tsp garlic powder
1/2 tsp dried basil
1 tsp dried parsley
1. Preheat oven to 400F.
2. Cut all pita bread into whatever sizes/shapes you want your chips to be. Place them on a lined cookie sheet.
3. In a small bowl combine the remaining ingredients and mix well. Brush each pita piece with oil mixture.
4. Bake for 5-7 minutes, or until lightly golden and crispy. Watch carefully, as they brown easily!
I prepared the dip the day before (minus baking it.) Because of this, it was colder from being in the fridge over night, so I baked it for an extra 10 or 15 minutes. It still turned out amazing!
The chips were really yummy. The herbed seasoning was not very strong. They had a nice and subtle taste to them, and made the house smell delicious.
I hope you're not too busy, and you are finding time to relax during your holidays. I miss you and am really excited to see you again (hopefully soon!)
Love,
Labels:
appetizers,
beans,
cheese,
onion,
pita,
simple,
snack,
spinach,
vegetarian
Sunday, November 25, 2012
Sunday Snack: Tuna Patties with Garlic, Lemon Aioli
Dear Jess,
It was so wonderful to see you the other night, even if it was for only a couple hours. I cherish our 'snuggle' times.
My plan today was to make Jamie's Shortbreads. As it turns out, I had to wait for my butter to come to room temperature before I could start. Thus, I tried this quick little number. It comes from a cookbook that my mom picked up at Costco called Everyday Paleo Family Cookbook. It's part of a new 'eating lifestyle' that is fast spreading. I like the concept as it falls in with eating whole foods, and cutting out refined sugars, flours and preservatives. I guess it's not so much new as 're-invented'. It has recipes for all sorts of dressings, mayo, ketchup, BBQ sauces etc. This book is beautifully put together, with an index of the names of the recipes paired with a picture of it! I have made my grocery list to include a couple meals from this book.
I can still taste this one! Jason and I just finished eating it 10 minutes ago. I didn't have high hopes for it, as it looked too simple to be delicious. I was (happily) wrong.
Tuna Patties with Garlic, Lemon Aioli
From Everyday Paleo Family Cookbook
3 cans of Tuna packed in water and drained
2 eggs
1/2 tsp dried dill
1/2 tsp sea salt
1/4 tsp black pepper
2 tbsp coconut oil
1. Mix the tuna with eggs, dill, salt and pepper.
2. In a large skillet, heat the coconut oil over medium to meium-high heat. make sure the oil is nice and hot!
3. Form the tuna mixture into 11-12 small, slightly flattened patties and cook in the hot oil for 2-3 minutes per side.
4. You will not be able to fit all 11-12 in your pan at the same time, so you might have to add more oil for each batch. Make sure the patties are brown before you flip them so that they hold together! Serve with my Simply Coleslaw (p. 202) and topped with Garlic Lemon Aioli (p.72).
I'm sure you understand the benefits of coconut oil. I love that you can use it on medium to high heat with no fatty, unhealthy things happening to the oil, or your food. (It is expensive, but I wait until the Bulk Barn has a sale.) It created a really nice 'deep-fried' browning on the patties. So long as you leave them long enough these patties do stay together.
Fortunately, we had just come from my mom's last night with some left over coleslaw, so I just pulled that out of the fridge. I haven't made my own mayo yet, so I simply used some olive oil mayo, minced garlic, and lemon juice for the aioli. Just keep mixing until the flavour is where you want it!
I also realized you didn't take Beauty and the Beast with you! I will try to remember to bring it for you Christmas party.
Lots of Love,
It was so wonderful to see you the other night, even if it was for only a couple hours. I cherish our 'snuggle' times.
My plan today was to make Jamie's Shortbreads. As it turns out, I had to wait for my butter to come to room temperature before I could start. Thus, I tried this quick little number. It comes from a cookbook that my mom picked up at Costco called Everyday Paleo Family Cookbook. It's part of a new 'eating lifestyle' that is fast spreading. I like the concept as it falls in with eating whole foods, and cutting out refined sugars, flours and preservatives. I guess it's not so much new as 're-invented'. It has recipes for all sorts of dressings, mayo, ketchup, BBQ sauces etc. This book is beautifully put together, with an index of the names of the recipes paired with a picture of it! I have made my grocery list to include a couple meals from this book.
I can still taste this one! Jason and I just finished eating it 10 minutes ago. I didn't have high hopes for it, as it looked too simple to be delicious. I was (happily) wrong.
Tuna Patties with Garlic, Lemon Aioli
From Everyday Paleo Family Cookbook
3 cans of Tuna packed in water and drained
2 eggs
1/2 tsp dried dill
1/2 tsp sea salt
1/4 tsp black pepper
2 tbsp coconut oil
1. Mix the tuna with eggs, dill, salt and pepper.
2. In a large skillet, heat the coconut oil over medium to meium-high heat. make sure the oil is nice and hot!
3. Form the tuna mixture into 11-12 small, slightly flattened patties and cook in the hot oil for 2-3 minutes per side.
4. You will not be able to fit all 11-12 in your pan at the same time, so you might have to add more oil for each batch. Make sure the patties are brown before you flip them so that they hold together! Serve with my Simply Coleslaw (p. 202) and topped with Garlic Lemon Aioli (p.72).
I'm sure you understand the benefits of coconut oil. I love that you can use it on medium to high heat with no fatty, unhealthy things happening to the oil, or your food. (It is expensive, but I wait until the Bulk Barn has a sale.) It created a really nice 'deep-fried' browning on the patties. So long as you leave them long enough these patties do stay together.
Fortunately, we had just come from my mom's last night with some left over coleslaw, so I just pulled that out of the fridge. I haven't made my own mayo yet, so I simply used some olive oil mayo, minced garlic, and lemon juice for the aioli. Just keep mixing until the flavour is where you want it!
I also realized you didn't take Beauty and the Beast with you! I will try to remember to bring it for you Christmas party.
Lots of Love,
Thursday, August 30, 2012
Kale 'Chips'
Hello again!
I just wanted to share this little tid-bit of a recipe with you. It's nothing fancy, but they surprised me.
For a couple weeks now I have been hearing whispers about these 'Kale Chips'. That's right. Chips apparently made from kale. And I don't mean processed Kale. I mean Kale chopped and baked from your garden...
I had to try.
Kale Chips
Click here for recipe source
Kale
Olive oil
Salt
Preheat your oven to 325F.
With scissors, cut the sides (the leafy part) of the Kale from the stem. You don't want any of the center stem included. Cut the leafy parts into bite-sized pieces (or a little bigger because they shrink in the oven) and put them in a bowl. Toss with a tiny drizzle of Olive Oil (about 1 TSP), Salt and whatever other seasonings you want (I did Paprika.)
Lay on a non-insulated baking sheet lined with parchment paper.
Bake in oven for 5-10 minutes until crisp but not burnt! (I burned my first batch because I was not watching close enough... luckily I still have a tone of Kale in the back yard!)
Remove them from the oven and let cool slightly. Transfer to a bowl and eat them! Eat them all! They are so addictive!
That being said... I will not pretend to think they are a good substitute for chips. Jesse won't be impressed if you give him these instead of some Ruffles... however for the ladies, it is a nice little 'munchy' snack.
Have a good long weekend!
Love,
I just wanted to share this little tid-bit of a recipe with you. It's nothing fancy, but they surprised me.
For a couple weeks now I have been hearing whispers about these 'Kale Chips'. That's right. Chips apparently made from kale. And I don't mean processed Kale. I mean Kale chopped and baked from your garden...
I had to try.
Kale Chips
Click here for recipe source
Kale
Olive oil
Salt
Preheat your oven to 325F.
With scissors, cut the sides (the leafy part) of the Kale from the stem. You don't want any of the center stem included. Cut the leafy parts into bite-sized pieces (or a little bigger because they shrink in the oven) and put them in a bowl. Toss with a tiny drizzle of Olive Oil (about 1 TSP), Salt and whatever other seasonings you want (I did Paprika.)
Lay on a non-insulated baking sheet lined with parchment paper.
Bake in oven for 5-10 minutes until crisp but not burnt! (I burned my first batch because I was not watching close enough... luckily I still have a tone of Kale in the back yard!)
Remove them from the oven and let cool slightly. Transfer to a bowl and eat them! Eat them all! They are so addictive!
That being said... I will not pretend to think they are a good substitute for chips. Jesse won't be impressed if you give him these instead of some Ruffles... however for the ladies, it is a nice little 'munchy' snack.
Have a good long weekend!
Love,
Labels:
easy,
kale,
quick,
snack,
vegetables,
vegetarian
Tuesday, August 28, 2012
Healthy (and Delicious!) Cookies
Dear Jess,
Words cannot express how much I long to see you. I feel like we have so much to catch up on and share with each other.
Today has been lovely. It has been a wonderfully sunny and breezy day. I have all my windows wide open and fresh air is seeping into my house. This inspired me to browse my cookbooks, and within one I found an intriguing recipe that I had to make to see if it was any good. The result: success!
I found this one in the Quinoa 365 The Everyday Super Food cookbook that my mom picked up for me from Costco. Well... truth be told... I'm not sure it was for me... but it has ended up in my kitchen... so I'm going with it!
On page 131 you will find a recipe for Healthy Cookies. The only part of this recipe I don't like happens to be the name. They should be called Energy Bites or something a little more attractive. I, however, did not write this book. And thank goodness too, because I never would have been able to think this puppy up! As you already know, Quinoa is full of so many good things (it's a full protein, and a big source of fibre etc etc) that to add even more good things to these cookies is just a bonus! I look forward to sending these in Jason's lunch. They promise to give him lots of energy for his laborious days.
Healthy Cookies
from Quinoa 365, page 131
2/3 cup water
1/3 cup quinoa
1 cup butter, softened
1 1/3 cups packed brown sugar
2 large eggs
1 1/2 tsp pure vanilla extract
2 cups whole wheat flour
1 1/2 tsp baking powder
1 tsp baking soda
1 tsp ground cinnamon
1/4 tsp salt
1 1/4 cups quick-cooking rolled oats
1 cup flaked unsweetened coconut
1 1/3 cup sunflower seeds, unsalted
1/3 cup flax (ground or whole seeds)
1/3 cup sesame seeds
Bring the water and quinoa to a boil in a small saucepan. Reduce to a simmer, cover and cook for 10 minutes. Turn the heat off and leave the covered saucepan on the burner for an additional 6 minutes. Remove the lid and fluff with a fork. Set aside to cool.
Preheat the oven to 350F. Grease a large baking sheet, or line it with parchment.
Cream the butter with the brown sugar in a large bowl. Add the eggs and vanilla and mix thoroughly.
Combine the flour, baking powder, baking soda, cinnamon and salt in a medium bowl. Add the oats, cooked quinoa, coconut, sunflower seeds, flax and sesame seeds to the flour mixture and stir until well blended. Combine with the butter mixture and stir until well mixed. Roll the dough into 1 1/2 inch balls. Place 2 inches apart on the prepared baking sheet. Flatten each cookie slightly with the palm of your hand. Bake on the center oven rack for 8-10 minutes, until the bottoms are light brown. Allow the cookies to cool completely on the baking sheet. Store the cookies in a sealed container in the refrigerator for up to 1 week.
My house smells so good right now from these little darlings. (That's right... I couldn't wait another moment before sharing it with you... the last tray is still cooling behind me.) So easy. So yummy. Such a good idea.
Love,
Words cannot express how much I long to see you. I feel like we have so much to catch up on and share with each other.
Today has been lovely. It has been a wonderfully sunny and breezy day. I have all my windows wide open and fresh air is seeping into my house. This inspired me to browse my cookbooks, and within one I found an intriguing recipe that I had to make to see if it was any good. The result: success!
I found this one in the Quinoa 365 The Everyday Super Food cookbook that my mom picked up for me from Costco. Well... truth be told... I'm not sure it was for me... but it has ended up in my kitchen... so I'm going with it!
On page 131 you will find a recipe for Healthy Cookies. The only part of this recipe I don't like happens to be the name. They should be called Energy Bites or something a little more attractive. I, however, did not write this book. And thank goodness too, because I never would have been able to think this puppy up! As you already know, Quinoa is full of so many good things (it's a full protein, and a big source of fibre etc etc) that to add even more good things to these cookies is just a bonus! I look forward to sending these in Jason's lunch. They promise to give him lots of energy for his laborious days.
Healthy Cookies
from Quinoa 365, page 131
2/3 cup water
1/3 cup quinoa
1 cup butter, softened
1 1/3 cups packed brown sugar
2 large eggs
1 1/2 tsp pure vanilla extract
2 cups whole wheat flour
1 1/2 tsp baking powder
1 tsp baking soda
1 tsp ground cinnamon
1/4 tsp salt
1 1/4 cups quick-cooking rolled oats
1 cup flaked unsweetened coconut
1 1/3 cup sunflower seeds, unsalted
1/3 cup flax (ground or whole seeds)
1/3 cup sesame seeds
Bring the water and quinoa to a boil in a small saucepan. Reduce to a simmer, cover and cook for 10 minutes. Turn the heat off and leave the covered saucepan on the burner for an additional 6 minutes. Remove the lid and fluff with a fork. Set aside to cool.
Preheat the oven to 350F. Grease a large baking sheet, or line it with parchment.
Cream the butter with the brown sugar in a large bowl. Add the eggs and vanilla and mix thoroughly.
Combine the flour, baking powder, baking soda, cinnamon and salt in a medium bowl. Add the oats, cooked quinoa, coconut, sunflower seeds, flax and sesame seeds to the flour mixture and stir until well blended. Combine with the butter mixture and stir until well mixed. Roll the dough into 1 1/2 inch balls. Place 2 inches apart on the prepared baking sheet. Flatten each cookie slightly with the palm of your hand. Bake on the center oven rack for 8-10 minutes, until the bottoms are light brown. Allow the cookies to cool completely on the baking sheet. Store the cookies in a sealed container in the refrigerator for up to 1 week.
My house smells so good right now from these little darlings. (That's right... I couldn't wait another moment before sharing it with you... the last tray is still cooling behind me.) So easy. So yummy. Such a good idea.
Love,
Tuesday, August 21, 2012
Jamie Oliver's Sher Ping Pancakes
Dear Jess,
On Mondays I do the grocery shopping. So on Sundays I always ask Jason, 'What would you like to eat this week?' He then goes through some cookbooks and picks one or two things he would like to have. I then add a third 'new' thing that I would like to try to make.
This week I was craving Sher Ping Pancakes from Jamie's America. That's right. I'm back to Jamie. I missed him and his creative food genius. I have, in fact, made this once before when I first got this cookbook. Probably just over 2 years ago. I made them the day Jason asked me on our first 'official' date. I remember I had trouble with the dough and was interested to see if I could do better. Also: they are delicious. Jamie says:
'Sher ping translates as "pan-cooked filled pancake," and they are one of the best things I've eaten in ages. A lovely lady from the north of China taught me how to make them at her food counter in the Roosevelt Food Court. It sounds like a cheat to explain how to make these pancakes, but it's well worth mastering, because you can swap the pork for other delicious fillings like chicken or seafood.' - Jamie's America, page 49
If you make these (which I definitely think you should) keep in mind that you will need the whole afternoon. The dough has to sit for a couple hours, and then after stuffing them they need to chill in the fridge for 20 minutes before you cook them.
I doubled this recipe and used whole wheat bread flour instead of white. (I know... risky... but it turned out so good!) I am going to try to freeze half of them and see how they turn out. (One single batch will make 8. A double makes 16.)
On last thing that is very important... I find you need way more water or less flour. You want your dough to be really stretchy. Whenever I do it exactly like the recipe it's always too dry.
Sher Ping Pancakes
from Jamie's America, Page 49
For the dough
3 1/4 cups white bread flour, plus extra for dusting (I used whole wheat bread flour)
scant 1 cup water
1/4 cup vegetable oil (I used Extra Virgin Olive Oil)
sea salt and freshly ground black pepper
For the filling
14oz ground pork, the best quality you can afford
a handful of finely grated white cabbage (No Frills didn't have any... so I used Savoy cabbage)
a small bunch of fresh cilantro, leaves and stalks finely chopped
a thumb-sized pieces of root ginger peeled and finely grated
4 scallions, trimmed and finely grated
sea salt
freshly ground Szechuan pepper (I used Cayenne pepper)
To serve
sweet chile or hot chile sauce
soy sauce
2 limes, cut into wedges
Make the dough by mixing the flour, water, vegetable oil, a bit of pepper, and a pinch of salt with a fork. Then use your hands to knead it until smooth and elastic. Cover it with plastic wrap and let it rest for a couple of hours.
When you're ready to make your pancakes, mix all your filling ingredients together in a large bowl. Use your hands to really scrunch everything together, and season well with a good pinch of salt and Szechuan pepper.
Dust a clean surface with flour and cut the dough into 8. Divide your filling into 8 even piles. Oil a sheet pan and your hands. Pick up a piece of dough and create a patty like a mini pizza about 4 3/4 inches across and 1/2 inch thick. (I just do it as thin as I can while pretending I'm making a pizza with Dad's secret recipe dough.)
Take one of your piles of filling and pop it into the middle of the dough. Pat it flat with your fingers, then slowly stretch the edges of the dough out, folding them back in over the pork mixture. Do this all the way around and, once closed, press down on the stuffed pancake with your hand. It should be about 1 inch thick and 3 1/4 inches across. (mine were wider because I find it easier than doing it on the frying pan...)
Do the same with the other 7 pancakes, then lay them on your oiled sheet pan and put them into the refrigerator for about 20 minutes or so. After that, get a large dry frying pan on a medium heat. Add a tiny drizzle of oil and lay each pancake, folded side down, in the pan. Gently push down on them with a spatula to flatten them slightly. Keep doing this until they're about 1/2 inch thick and about 4 inches wide. Be careful that the pan's not too hot, though, otherwise your pancakes will brown before they're properly cooked through.
After about 4 minutes you'll have a nice golden color happening, so turn the pancakes over, push them down lightly, and cook them for 4 minutes on the other side. Only push down once on this side. When they're golden and crisp, the meat will be perfectly cooked, but you can always break one open to check.
To serve, pour some chile sauce into one bowl and some soy sauce into another. Pop a few wedges of lime on the side for squeezing over, and dunk away in your sauces. These pancakes hit all the right spots!
So yummy!
I have so much to tell you about Spain! The trip was incredible (duh!) and I will post an entry all about the food we tried once I get all the pictures together! I have already tried to make a couple of them at home!
I love you and miss you. I hope we can get together soon.
Love,
On Mondays I do the grocery shopping. So on Sundays I always ask Jason, 'What would you like to eat this week?' He then goes through some cookbooks and picks one or two things he would like to have. I then add a third 'new' thing that I would like to try to make.
This week I was craving Sher Ping Pancakes from Jamie's America. That's right. I'm back to Jamie. I missed him and his creative food genius. I have, in fact, made this once before when I first got this cookbook. Probably just over 2 years ago. I made them the day Jason asked me on our first 'official' date. I remember I had trouble with the dough and was interested to see if I could do better. Also: they are delicious. Jamie says:
'Sher ping translates as "pan-cooked filled pancake," and they are one of the best things I've eaten in ages. A lovely lady from the north of China taught me how to make them at her food counter in the Roosevelt Food Court. It sounds like a cheat to explain how to make these pancakes, but it's well worth mastering, because you can swap the pork for other delicious fillings like chicken or seafood.' - Jamie's America, page 49
If you make these (which I definitely think you should) keep in mind that you will need the whole afternoon. The dough has to sit for a couple hours, and then after stuffing them they need to chill in the fridge for 20 minutes before you cook them.
I doubled this recipe and used whole wheat bread flour instead of white. (I know... risky... but it turned out so good!) I am going to try to freeze half of them and see how they turn out. (One single batch will make 8. A double makes 16.)
On last thing that is very important... I find you need way more water or less flour. You want your dough to be really stretchy. Whenever I do it exactly like the recipe it's always too dry.
Sher Ping Pancakes
from Jamie's America, Page 49
For the dough
3 1/4 cups white bread flour, plus extra for dusting (I used whole wheat bread flour)
scant 1 cup water
1/4 cup vegetable oil (I used Extra Virgin Olive Oil)
sea salt and freshly ground black pepper
For the filling
14oz ground pork, the best quality you can afford
a handful of finely grated white cabbage (No Frills didn't have any... so I used Savoy cabbage)
a small bunch of fresh cilantro, leaves and stalks finely chopped
a thumb-sized pieces of root ginger peeled and finely grated
4 scallions, trimmed and finely grated
sea salt
freshly ground Szechuan pepper (I used Cayenne pepper)
To serve
sweet chile or hot chile sauce
soy sauce
2 limes, cut into wedges
Make the dough by mixing the flour, water, vegetable oil, a bit of pepper, and a pinch of salt with a fork. Then use your hands to knead it until smooth and elastic. Cover it with plastic wrap and let it rest for a couple of hours.
When you're ready to make your pancakes, mix all your filling ingredients together in a large bowl. Use your hands to really scrunch everything together, and season well with a good pinch of salt and Szechuan pepper.
Dust a clean surface with flour and cut the dough into 8. Divide your filling into 8 even piles. Oil a sheet pan and your hands. Pick up a piece of dough and create a patty like a mini pizza about 4 3/4 inches across and 1/2 inch thick. (I just do it as thin as I can while pretending I'm making a pizza with Dad's secret recipe dough.)
Take one of your piles of filling and pop it into the middle of the dough. Pat it flat with your fingers, then slowly stretch the edges of the dough out, folding them back in over the pork mixture. Do this all the way around and, once closed, press down on the stuffed pancake with your hand. It should be about 1 inch thick and 3 1/4 inches across. (mine were wider because I find it easier than doing it on the frying pan...)
Do the same with the other 7 pancakes, then lay them on your oiled sheet pan and put them into the refrigerator for about 20 minutes or so. After that, get a large dry frying pan on a medium heat. Add a tiny drizzle of oil and lay each pancake, folded side down, in the pan. Gently push down on them with a spatula to flatten them slightly. Keep doing this until they're about 1/2 inch thick and about 4 inches wide. Be careful that the pan's not too hot, though, otherwise your pancakes will brown before they're properly cooked through.
After about 4 minutes you'll have a nice golden color happening, so turn the pancakes over, push them down lightly, and cook them for 4 minutes on the other side. Only push down once on this side. When they're golden and crisp, the meat will be perfectly cooked, but you can always break one open to check.
To serve, pour some chile sauce into one bowl and some soy sauce into another. Pop a few wedges of lime on the side for squeezing over, and dunk away in your sauces. These pancakes hit all the right spots!
So yummy!
I have so much to tell you about Spain! The trip was incredible (duh!) and I will post an entry all about the food we tried once I get all the pictures together! I have already tried to make a couple of them at home!
I love you and miss you. I hope we can get together soon.
Love,
Labels:
bread,
comfort food,
hearty,
Jamie Oliver,
pork,
snack
Monday, July 30, 2012
Moroccan and Rollin' Quinoa Salad
Dear Jess,
This Quinoa (pronounced keen-wah) Salad is so good that I made it last week and I am right at this minute making it again. As I sit here writing this entry (in our newly painted 'study/office/drawing room',) the Quinoa is in the pot boiling, and the aroma is floating through the house. (I also have bread baking in the bread-maker, so my house basically smells like heaven.) This is another gem from the Podleski sisters (The Looneyspoons Collection.) On page 38 you will find Moroccan and Rollin' Quinoa Salad.
I have fallen in love with this particular seed for many reasons. One being you can do so much with it, another being it's delicious, and most importantly: it is a full protein! Janet and Greta have a nice little description of it that I will share here with you:
"Though commonly referred to as a grain, quinoa is actually a seed of the goosefoot plant, a relative of leafy green vegetables like spinach and Swiss chard. Once considered 'the gold of the Incas,' Aztec warriors used quinoa to increase their stamina. It's not wonder: quinoa is a nutritional powerhouse! It has twice the protein of brown rice and contains all nine essential amino acids (nutritional building blocks that help form proteins and muscle and other tissue) - rare in the plant kingdom. That's why quinoa is winning the popularity contest among vegetarians and others who don't want to eat meal 'til the cows come home. All that protein plus tons of fiber make it a waist-watcher's dream, a diabetic's dream, a cholesterol-lowering dream and... well... a dream come true for anone who wants to put the best possible fuel in their body. The tiny seeds can boost energy and also contain lots of magnesium that can help prevent high blood pressure and osteoporosis. As an added bonus, quinoa is gluten-free, ideal for those with Celiac disease or other grain sensitivities." (page 38 of The Looneyspoons Collection)
So there you go! One major tip when buying quinoa: make sure you get 'prewashed' or 'prerinsed' quinoa. It will say this on the package. If you don't you have to thoroughly strain it.
Moroccan and Rollin' Quinoa Salad
From Janet and Greta Podleski's The Looneyspoons Collection
1 cup uncooked quinoa
2 cups reduced-sodium vegetable broth
1/4 cup dried currants (I didn't do this)
1 tsp curry powder
1 tsp ground cumin
1/2 tsp ground coriander
1 tsp liquid honey
1/2 tsp salt
1 cup canned no-salt-added chickpeas, drained and rinsed
1/2 cup each finely chopped red bell pepper, grated corrotts and peeled, diced English cucumber
1/3 cup chopped green onions
2 tbsp olive oil
2 tbsp freshly squeezed lemon juice
2 tbsp minced fresh mint leaves
1/4/ tsp freshly ground black pepper
1. Combine quinoa, broth, currants, curry, cumin, coriander, honey and salt in a medium pot. Bring to a boil. Reduce heat to low, cover and simmer for about 20 minutes or until quinoa has absorbed all liquid. Remove from heat. Let stand covered for 10 minutes. Fluff with a fork and leave uncovered to cool completely.
2. When quinoa is cool, transfer to large mixing bowl. Stir in all remaining ingredients. Mix will and refrigerate for at least an hour or two before serving. Tastes even better the next day!
This salad I eat most days for lunch and also include some in Jason's lunch. (He loves it!) It will last me about a week. I will likely make a big batch of this before I go to Spain as part of Jason's 'meal plan' that I will be leaving him.
I can't wait to see/talk to you soon. Hopefully before I leave, but if not sometime shortly after I get back.
Love,
Sally*
*(my signature is on my other computer which is giving me some problems lately...)
This Quinoa (pronounced keen-wah) Salad is so good that I made it last week and I am right at this minute making it again. As I sit here writing this entry (in our newly painted 'study/office/drawing room',) the Quinoa is in the pot boiling, and the aroma is floating through the house. (I also have bread baking in the bread-maker, so my house basically smells like heaven.) This is another gem from the Podleski sisters (The Looneyspoons Collection.) On page 38 you will find Moroccan and Rollin' Quinoa Salad.
I have fallen in love with this particular seed for many reasons. One being you can do so much with it, another being it's delicious, and most importantly: it is a full protein! Janet and Greta have a nice little description of it that I will share here with you:
"Though commonly referred to as a grain, quinoa is actually a seed of the goosefoot plant, a relative of leafy green vegetables like spinach and Swiss chard. Once considered 'the gold of the Incas,' Aztec warriors used quinoa to increase their stamina. It's not wonder: quinoa is a nutritional powerhouse! It has twice the protein of brown rice and contains all nine essential amino acids (nutritional building blocks that help form proteins and muscle and other tissue) - rare in the plant kingdom. That's why quinoa is winning the popularity contest among vegetarians and others who don't want to eat meal 'til the cows come home. All that protein plus tons of fiber make it a waist-watcher's dream, a diabetic's dream, a cholesterol-lowering dream and... well... a dream come true for anone who wants to put the best possible fuel in their body. The tiny seeds can boost energy and also contain lots of magnesium that can help prevent high blood pressure and osteoporosis. As an added bonus, quinoa is gluten-free, ideal for those with Celiac disease or other grain sensitivities." (page 38 of The Looneyspoons Collection)
So there you go! One major tip when buying quinoa: make sure you get 'prewashed' or 'prerinsed' quinoa. It will say this on the package. If you don't you have to thoroughly strain it.
Moroccan and Rollin' Quinoa Salad
From Janet and Greta Podleski's The Looneyspoons Collection
1 cup uncooked quinoa
2 cups reduced-sodium vegetable broth
1/4 cup dried currants (I didn't do this)
1 tsp curry powder
1 tsp ground cumin
1/2 tsp ground coriander
1 tsp liquid honey
1/2 tsp salt
1 cup canned no-salt-added chickpeas, drained and rinsed
1/2 cup each finely chopped red bell pepper, grated corrotts and peeled, diced English cucumber
1/3 cup chopped green onions
2 tbsp olive oil
2 tbsp freshly squeezed lemon juice
2 tbsp minced fresh mint leaves
1/4/ tsp freshly ground black pepper
1. Combine quinoa, broth, currants, curry, cumin, coriander, honey and salt in a medium pot. Bring to a boil. Reduce heat to low, cover and simmer for about 20 minutes or until quinoa has absorbed all liquid. Remove from heat. Let stand covered for 10 minutes. Fluff with a fork and leave uncovered to cool completely.
2. When quinoa is cool, transfer to large mixing bowl. Stir in all remaining ingredients. Mix will and refrigerate for at least an hour or two before serving. Tastes even better the next day!
This salad I eat most days for lunch and also include some in Jason's lunch. (He loves it!) It will last me about a week. I will likely make a big batch of this before I go to Spain as part of Jason's 'meal plan' that I will be leaving him.
I can't wait to see/talk to you soon. Hopefully before I leave, but if not sometime shortly after I get back.
Love,
Sally*
*(my signature is on my other computer which is giving me some problems lately...)
Labels:
appetizers,
chickpeas,
curry,
easy,
gluten-free,
hearty,
quinoa,
salad,
simple,
snack,
vegetables,
vegetarian
Tuesday, July 24, 2012
Chewy Chocolate Chip Granola Bars
Dear Jess,
We need to Skype soon! I want to hear everything about your honeymoon(s), and how co-habitation is going! Again... I am so excited for you!
I am almost as excited about these granola bars... but obviously not quite that excited. I have tried a couple different recipes over the years, and some have been rather tasty, but usually they are either too dry, too moist, or not yummy enough to bother making them again. This one, however, has won me over! If you are part of a 'peanut-free' school these will not due. I'm sure you could substitute the peanut butter for whatever you're allowed to use instead. Is it true that someone came up with an entirely nut free peanut butter twin but it tasted and looked so much like peanut butter that some schools banned it too in case it was mixed up?! Anyways... the point is: these are delicious.
I found it somewhere on the internet, but for the life of me I cannot find it again... good thing I printed it out!
Chewy Chocolate Chip Granola Bars
1 cup firmly packed brown sugar
2/3 cup peanut butter
1/2 cup liquid honey
1/2 cup butter, melted
2 tsp vanilla extract
3 cups quick-cooking rolled oats
1/2 cup shredded unsweetened coconut
1/2 cup sunflower seeds
1/2 cup craisins
1/2 cup wheat germ
2 tbsp sesame seeds
1 cup dark chocolate chips
1. Preheat oven to 350. Lightly grease 13x9 inch baking pan.
2. In a large bowl, combine brown sugar, peanut butter, honey, melted butter and vanilla and blend well.
3. Stir in remaining ingredients and mix well.
4. Press mixture evenly into prepared pan.
5. Bake for 15-20 minutes or until light golden brown.
6. Cool pan completely on wire rack (or in fridge)
7. Cut bars into desired size and shape.
Oh man. So tasty. Especially as an 'energy-boost' snack. I will be making these again for sure!
Love,
We need to Skype soon! I want to hear everything about your honeymoon(s), and how co-habitation is going! Again... I am so excited for you!
I am almost as excited about these granola bars... but obviously not quite that excited. I have tried a couple different recipes over the years, and some have been rather tasty, but usually they are either too dry, too moist, or not yummy enough to bother making them again. This one, however, has won me over! If you are part of a 'peanut-free' school these will not due. I'm sure you could substitute the peanut butter for whatever you're allowed to use instead. Is it true that someone came up with an entirely nut free peanut butter twin but it tasted and looked so much like peanut butter that some schools banned it too in case it was mixed up?! Anyways... the point is: these are delicious.
I found it somewhere on the internet, but for the life of me I cannot find it again... good thing I printed it out!
Chewy Chocolate Chip Granola Bars
1 cup firmly packed brown sugar
2/3 cup peanut butter
1/2 cup liquid honey
1/2 cup butter, melted
2 tsp vanilla extract
3 cups quick-cooking rolled oats
1/2 cup shredded unsweetened coconut
1/2 cup sunflower seeds
1/2 cup craisins
1/2 cup wheat germ
2 tbsp sesame seeds
1 cup dark chocolate chips
1. Preheat oven to 350. Lightly grease 13x9 inch baking pan.
2. In a large bowl, combine brown sugar, peanut butter, honey, melted butter and vanilla and blend well.
3. Stir in remaining ingredients and mix well.
4. Press mixture evenly into prepared pan.
5. Bake for 15-20 minutes or until light golden brown.
6. Cool pan completely on wire rack (or in fridge)
7. Cut bars into desired size and shape.
Oh man. So tasty. Especially as an 'energy-boost' snack. I will be making these again for sure!
Love,
Labels:
chocolate,
cranberries,
hearty,
peanut butter,
simple,
snack,
sweet,
vanilla
Tuesday, May 22, 2012
Sweet Potato Bran Muffins
Dear Jess,
What a weekend. I can not express how thankful I am for you and Jesse to take the time out of your oh-so-busy schedule and come to TWO of our celebrations. I am truly honoured, and cannot believe how blessed I am to have you two in our lives.
Last week I tried my hand at muffins! I am trying to branch out in my baking world (yet again.) This is mainly to keep 'snack' foods in the house that are not chips (because I would eat all the chips...) So far I am doing well! These muffins are from Eat Shrink and be Merry by Janet and Greta Poldeski. They are unbelievably full of flavour, and it is extremely easy to swap ingredients to suit your taste. I will definitely be making these again!
A Bran New World (Sweet Potato Bran Muffins)
Makes 12 regular muffins
adapted from A Bran New World, Eat Shrink and be Merry by Greta and Janet Poldeski
1 cup cooked, mashed sweet potato (about 1 medium potato)
1 cup plain Greek yogurt
1/2 cup packed brown sugar
3 tbsp olive oil
2 eggs
2 tsp grated orange zest
4 cups Bran Flakes cereal
1 1/4 cups all-purpose whole wheat flour
1/2 cup dried cranberries
2 tsp baking powder
1 tsp baking soda
1 tsp ground cinnamon
1/2 tsp salt
1/4 tsp each ground nutmeg and pumpkin pie spice
1. Preaheat oven to 375F. Spray a 12-cup muffin tin with cooking spray and set aside.
2. In a large bowl, whisk together sweet potato, Greek yogurt, brown sugar, olive oil, eggs, and orange zest.
3. In another large bowl, combine flour, dried cranberries, baking powder, baking soda, cinnamon, salt, nutmeg and pumpkin-pie spice. Add wet ingredients to dry ingredients and mix just until dry ingredients are moistened. Batter will be thick.
4. Divide batter evenly among muffin cups. Bake for 17 or 18 minutes, or until muffins are golden brown and a toothpick inserted in center of muffin comes out clean. Remove muffins from pan and cool slightly on a wire rack. Serve warm.
As you can see, I also added some chocolate chips. I had about 3 bags with a teeny bit of chocolate chips left... So I dumped them in too!
I hope all is going well on your end. I can't wait to see you again this weekend!
So much love,
What a weekend. I can not express how thankful I am for you and Jesse to take the time out of your oh-so-busy schedule and come to TWO of our celebrations. I am truly honoured, and cannot believe how blessed I am to have you two in our lives.
Last week I tried my hand at muffins! I am trying to branch out in my baking world (yet again.) This is mainly to keep 'snack' foods in the house that are not chips (because I would eat all the chips...) So far I am doing well! These muffins are from Eat Shrink and be Merry by Janet and Greta Poldeski. They are unbelievably full of flavour, and it is extremely easy to swap ingredients to suit your taste. I will definitely be making these again!
A Bran New World (Sweet Potato Bran Muffins)
Makes 12 regular muffins
adapted from A Bran New World, Eat Shrink and be Merry by Greta and Janet Poldeski
1 cup cooked, mashed sweet potato (about 1 medium potato)
1 cup plain Greek yogurt
1/2 cup packed brown sugar
3 tbsp olive oil
2 eggs
2 tsp grated orange zest
4 cups Bran Flakes cereal
1 1/4 cups all-purpose whole wheat flour
1/2 cup dried cranberries
2 tsp baking powder
1 tsp baking soda
1 tsp ground cinnamon
1/2 tsp salt
1/4 tsp each ground nutmeg and pumpkin pie spice
1. Preaheat oven to 375F. Spray a 12-cup muffin tin with cooking spray and set aside.
2. In a large bowl, whisk together sweet potato, Greek yogurt, brown sugar, olive oil, eggs, and orange zest.
3. In another large bowl, combine flour, dried cranberries, baking powder, baking soda, cinnamon, salt, nutmeg and pumpkin-pie spice. Add wet ingredients to dry ingredients and mix just until dry ingredients are moistened. Batter will be thick.
4. Divide batter evenly among muffin cups. Bake for 17 or 18 minutes, or until muffins are golden brown and a toothpick inserted in center of muffin comes out clean. Remove muffins from pan and cool slightly on a wire rack. Serve warm.
As you can see, I also added some chocolate chips. I had about 3 bags with a teeny bit of chocolate chips left... So I dumped them in too!
I hope all is going well on your end. I can't wait to see you again this weekend!
So much love,
Tuesday, March 6, 2012
Granola Energy Bites
Dear Jess,
Your last post made me salivate! I have been craving Chicken Parmesan for a couple months now! I think I crave these things when it gets cold.
Here is another little fun thing to make. They are from Eat Shrink and be Merry. They're called 'Goody Two Chews' and they're awesome! I made them because I was bored, and it gave me an excuse to visit the new Bulk Barn that opened this passed Friday. Jason has taken a couple of these treats to work in his lunch every day since!
I will be making these often for sure! I might even turn them into granola bars... with the possibility of dipping them in dark chocolate and/or peanut butter! The possibilities are endless!
Love,
Your last post made me salivate! I have been craving Chicken Parmesan for a couple months now! I think I crave these things when it gets cold.
Here is another little fun thing to make. They are from Eat Shrink and be Merry. They're called 'Goody Two Chews' and they're awesome! I made them because I was bored, and it gave me an excuse to visit the new Bulk Barn that opened this passed Friday. Jason has taken a couple of these treats to work in his lunch every day since!
Goody Two Chews
adapted from Eat, Shrink and be Merry by Janet and Greta Poldeski
1/3 cup light peanut butter
1/3 cup pure maple syrup
2 egg whites
1 tsp pumpkin pie spice
1 1/2 cups low-fat granola
3/4 cup dried cranberries
(I also added some mini dark chocolate chips!)
1. Preheat oven to 250F. Spray two 12 cup mini muffin trays and set aside. In a medium bowl, beat together peanut butter and maple syrup on medium speed of electric mixer (I just used a fork.) Add egg whites and pumpkin pie spice and beat again until smooth.
2. Stir in granola and cranberries. Divide mixture evenly among muffin cups. Bake on middle oven rack for 45 minutes
3. Remove from oven and cool completely on wire rack before removing clusters from pan. Store in an airtight container.
Note: I found that mixing wet ingredients in a smaller bowl, and dry ingredients in a bigger bowl and then pouring the wet mixture on top of the dry mixture was easier than the reverse. But to each his/her own!
Also... the book gives you a tip. Don't use overly sweet granola. These babies are going to be sweet enough! I just got the plain low-fat granola from The Bulk Barn with no added dried fruits etc.
Love,
Labels:
breakfast,
chocolate,
cookies,
cranberries,
easy,
hearty,
peanut butter,
simple,
snack
Tuesday, January 3, 2012
Stuffed Fillet Steak, and Savory Cheese and Bacon Muffins
Dearest Jess,
I hope your holidays have been everything you hoped them to be. I found mine to be busy, but perfectly balanced with relaxation. As always, there were many family dinners, and friends in from out of town. It was all wonderful.
Yesterday was my first day back to work since the 23rd. Jason and I had planned a dinner to make on Sunday night, but other things came up, so it was pushed to last night. We got the recipes from this great book that Robin gave me for my birthday. It's called Mix & Match Meals. To fully appreciate this book you really need to go pick one up. When you open it, the pages are split horizontally in three sections. The top one: appetizers, the middle: entrees, the bottom: desserts. So as you pick which one you want for each stage of your meal, you can flip through all the sections separately and in the end have all three recipes open at the same time. This means the process of making your grocery list is greatly simplified.
The Menu: Stuffed Fillet Steak with chili and parsley butter, with Savory Cheese and Bacon Muffins.
I have mixed feelings about this meal. The muffins were surprisingly amazing. If you make them with whole wheat/grain bread crumbs they become a healthier option. The steak was... interesting. I'm not sure I'm a fan of a cream cheese filling for a steak. Maybe if it was whipped with some fresh herbs and spices? Or spinach? Or feta and/or goat cheese instead? It needed something else. The butter I would put more chili flakes in. That being said, it would be delicious spread on some fresh bread.
All in all, it was a pretty plate.
Savory Cheese and Bacon Muffins
adapted from Mix&Match Meals, Page 108 (starters)
5 1/2 oz (150g) Canadian bacon, sliced
7oz (200g) Cheddar cheese, cut up into small cubes
1 1/4 cups whole wheat/grain bread crumbs
1/2 bunch of scallions, finely chopped
3 eggs
1/2 cup milk
salt and ground black pepper
Pam for greasing
1. Fry the bacon until cooked but not too crispy, then cut into bite-sized pieces. Mix together the cheese with the bread crumbs, scallions, eggs and milk. Stir in the bacon.
2. Season generously with salt and pepper, then spoon into 4 buttered ramekins (or into your muffin trays). Bake in the oven at 375F (190C) for about 25 minutes until risen and golden. Serve hot or cold.
Stuffed Fillet Steak with Chili and Parsley Butter
adapted from Mix&Match Meals, Page 64 (Main Course)
4 sirloin steaks, about 8oz (225g) each, cut to a minimum 1 inch (2.5cm) thick
4 1/2oz (125g) light cream cheese
1 tbsp olive oil
sea salt and freshly ground black pepper
for Chili and Parsley Butter
5 tbsp salted butter
1 tsp hot red pepper flakes
2 tbsp finely chopped flat-leaf parsley leaves
Spinach to serve
1. To make the chili and parsley butter, mix together all the ingredients in a bowl until well combined. Form into a sausage shape, and place in a piece of parchment paper. Roll up into a tube, twist each end of pepper, and chill for 30 minutes.
2. Heat the barbecue until hot. Take each fillet steak and, using a thin pointed knife pierce the side and move the knife from side to side to create a cavity, trying not to increase the size of the opening too much. Place a portion of cream cheese into each opening. Do not over stuff.
3. Grill the steaks on the barbecue over high heat for 3 minutes on each side, turning once. Set on a plate, and let rest for 5 minutes.
4. Serve on top of fresh spinach with a dollop of Chili and Parsley Butter for garnish.
I can't wait to hear about your travels! I hope all is and will continue to go safely.
Love,
I hope your holidays have been everything you hoped them to be. I found mine to be busy, but perfectly balanced with relaxation. As always, there were many family dinners, and friends in from out of town. It was all wonderful.
Yesterday was my first day back to work since the 23rd. Jason and I had planned a dinner to make on Sunday night, but other things came up, so it was pushed to last night. We got the recipes from this great book that Robin gave me for my birthday. It's called Mix & Match Meals. To fully appreciate this book you really need to go pick one up. When you open it, the pages are split horizontally in three sections. The top one: appetizers, the middle: entrees, the bottom: desserts. So as you pick which one you want for each stage of your meal, you can flip through all the sections separately and in the end have all three recipes open at the same time. This means the process of making your grocery list is greatly simplified.
The Menu: Stuffed Fillet Steak with chili and parsley butter, with Savory Cheese and Bacon Muffins.
I have mixed feelings about this meal. The muffins were surprisingly amazing. If you make them with whole wheat/grain bread crumbs they become a healthier option. The steak was... interesting. I'm not sure I'm a fan of a cream cheese filling for a steak. Maybe if it was whipped with some fresh herbs and spices? Or spinach? Or feta and/or goat cheese instead? It needed something else. The butter I would put more chili flakes in. That being said, it would be delicious spread on some fresh bread.
All in all, it was a pretty plate.
Savory Cheese and Bacon Muffins
adapted from Mix&Match Meals, Page 108 (starters)
5 1/2 oz (150g) Canadian bacon, sliced
7oz (200g) Cheddar cheese, cut up into small cubes
1 1/4 cups whole wheat/grain bread crumbs
1/2 bunch of scallions, finely chopped
3 eggs
1/2 cup milk
salt and ground black pepper
Pam for greasing
1. Fry the bacon until cooked but not too crispy, then cut into bite-sized pieces. Mix together the cheese with the bread crumbs, scallions, eggs and milk. Stir in the bacon.
2. Season generously with salt and pepper, then spoon into 4 buttered ramekins (or into your muffin trays). Bake in the oven at 375F (190C) for about 25 minutes until risen and golden. Serve hot or cold.
Stuffed Fillet Steak with Chili and Parsley Butter
adapted from Mix&Match Meals, Page 64 (Main Course)
4 sirloin steaks, about 8oz (225g) each, cut to a minimum 1 inch (2.5cm) thick
4 1/2oz (125g) light cream cheese
1 tbsp olive oil
sea salt and freshly ground black pepper
for Chili and Parsley Butter
5 tbsp salted butter
1 tsp hot red pepper flakes
2 tbsp finely chopped flat-leaf parsley leaves
Spinach to serve
1. To make the chili and parsley butter, mix together all the ingredients in a bowl until well combined. Form into a sausage shape, and place in a piece of parchment paper. Roll up into a tube, twist each end of pepper, and chill for 30 minutes.
2. Heat the barbecue until hot. Take each fillet steak and, using a thin pointed knife pierce the side and move the knife from side to side to create a cavity, trying not to increase the size of the opening too much. Place a portion of cream cheese into each opening. Do not over stuff.
3. Grill the steaks on the barbecue over high heat for 3 minutes on each side, turning once. Set on a plate, and let rest for 5 minutes.
4. Serve on top of fresh spinach with a dollop of Chili and Parsley Butter for garnish.
I can't wait to hear about your travels! I hope all is and will continue to go safely.
Love,
Friday, November 25, 2011
Christmas Bliss: Espresso-Chocolate Shortbread Cookies
To the future Mrs. Jessica Brickell,
Since your relationship status has been changed on Facebook, I am going to assume that I can officially say CONGRATULATIONS ON YOUR ENGAGEMENT! I am soooo thrilled for you both. You two make an amazing team and I am so excited to have shared in the first few moments after the proposal, and am looking forward to the excitement of wedding planning, and of course supporting and encouraging your future journey together. ... Have I mentioned that I am excited yet?!
So, on top of your exciting news, I have just realized how quickly Christmas is creeping up on us. I have decided (again) that most of my gifts will be homemade. Last night I decided to try this new recipe because - let's face it - I saw the recipe on my friend's blog Graceful Oven and almost melted in my seat. I thought to myself 'If these are as sublime as they sound then they will make perfect gifts!'
The ingredients are easy to get. I thought it would be difficult to find Instant Espresso, but there it was in the instant coffee section in Independent. When I went through the check out there was this adorable middle-aged cashier with an English accent who was intrigued with the Instant Espresso. She said she had never seen it before. Terrified that she would think I was actually going to drink the stuff and think it's good espresso, I quickly said I was using it for baking. Well this got her very excited and we spent a good 5 minutes (to the annoyance of the man in a backwards baseball cap in line behind me) about Christmas baking and what else you could incorporate Instant Espresso into. So, long story short, the Instant Espresso created an Instant Friendship that would never have happened otherwise. Trying new things is beneficial for all!
I used my mom's stand mixer. So I could actually mix a batch of these puppies in 8 minutes - from dropping the first ingredients into the mixer to putting the final dough into the fridge. (I made two batches because the first took so short of a time. We actually timed the second batch for fun.)
My friend got this recipe from another blog, and that girl made a groundbreaking suggestion: Why not try Toffee-Coffee Shortbread instead of Chocolate-Coffee Shortbread? So while going through my cupboards looking for the chocolate chips what do you think I found? That's right! A whole bag of toffee chips! That is the story of how my second batch became Toffee-Coffee Shortbread Cookies.
Espresso-Chocolate Shortbread Cookies
makes 42 cookies
1 tbsp instant espresso powder
1 tbsp boiling water
2 x 8oz sticks unsalted butter, at room temperature
2/3 cup confectioners' sugar
1/2 tsp pure vanilla extract
2 cups all-purpose flour
4oz bitter sweet chocolate, finely chopped, or 3/4 cup store-bought mini chocolate chips (or toffee bits!)
Confectioners' sugar, for dusting (optional)
1. Dissolve the espresso in the boiling water, and set aside to cool to tepid.
2. Working with a stand mixer, preferably fitted with a paddle attachment, or with a hand mixer in a large bowl, beat the butter and confectioners' sugar together on medium speed for about 3 minutes, until the mixture is very smooth. Beat in the vanilla and espresso, then reduce the mixer speed to low and add the flour, mixing only until it disappears into the dough. Don't work the dough much once the flour is incorporated. Fold in the chopped chocolate with a sturdy rubber spatula.
3. Using the spatula, transfer the soft, sticky dough to a gallon-size zipper-lock plastic bag. Put the bag on a flat surface, leaving the top open, and roll the dough into a 9 x 10 1/2 inch rectangle that's 1/4 inch thick. As you roll, turn the bag occasionally and lift teh plastic from teh dough so it doesn't cause creases. When you get the right size and thickness, seal the bag, pressing out as much air as possible, and refrigerate the dough for at least 2 hours, or for up to 2 days.
4. Position the racks to divide the oven into thirds and preheat the oven to 325 degrees F. Line two baking sheets with parchment or silicone mats.
5. Put the plastic bag on a cutting board and slit it open. Turn the firm dough out onto the board (discard the bag) and, using a ruler as a guide adn a sharp knife, cut the dough into 1 1/2 inch squares. Transfer the squares to the baking sheets and carefully prick each one twice with a fork, gently pushing the tines through the cookies until they hit the sheet.
6. Bake for 18-20 minutes, rotating hte sheets from top to bottom and front ot back at the midway point. The shortbreads will be pale - they shouldn't take on much color. Transfer the cookies to the rack.
7. If you'd like, dust the cookies with confectioners' sugar while they are still hot. Cool the cookies to room temperature before serving.
And there you go! Christmas presents for all! I baked mine a couple minutes too long. The next batch I will do for only 15 minutes (in a convection oven). I really really really love the concept of rolling the dough in the Ziplock bag. The dough gets so firm, that you can cut it out of the bag and cut off as many squares as you need for that day, and then transfer the rest of it into a new bag and put it back in the fridge! I still have 1/2 of each batch in the fridge to bake again tonight! And let me tell you... the smell that goes through the house when these babies are in the oven is absolutely heavenly! They should make candles that smell like these cookies!
I love you so much. I can't wait for our weekend coming up. Good luck with all your lesson planning and ... report cards? Is it that time of year or am I making it up?
All My Love,
Since your relationship status has been changed on Facebook, I am going to assume that I can officially say CONGRATULATIONS ON YOUR ENGAGEMENT! I am soooo thrilled for you both. You two make an amazing team and I am so excited to have shared in the first few moments after the proposal, and am looking forward to the excitement of wedding planning, and of course supporting and encouraging your future journey together. ... Have I mentioned that I am excited yet?!
So, on top of your exciting news, I have just realized how quickly Christmas is creeping up on us. I have decided (again) that most of my gifts will be homemade. Last night I decided to try this new recipe because - let's face it - I saw the recipe on my friend's blog Graceful Oven and almost melted in my seat. I thought to myself 'If these are as sublime as they sound then they will make perfect gifts!'
The ingredients are easy to get. I thought it would be difficult to find Instant Espresso, but there it was in the instant coffee section in Independent. When I went through the check out there was this adorable middle-aged cashier with an English accent who was intrigued with the Instant Espresso. She said she had never seen it before. Terrified that she would think I was actually going to drink the stuff and think it's good espresso, I quickly said I was using it for baking. Well this got her very excited and we spent a good 5 minutes (to the annoyance of the man in a backwards baseball cap in line behind me) about Christmas baking and what else you could incorporate Instant Espresso into. So, long story short, the Instant Espresso created an Instant Friendship that would never have happened otherwise. Trying new things is beneficial for all!
I used my mom's stand mixer. So I could actually mix a batch of these puppies in 8 minutes - from dropping the first ingredients into the mixer to putting the final dough into the fridge. (I made two batches because the first took so short of a time. We actually timed the second batch for fun.)
My friend got this recipe from another blog, and that girl made a groundbreaking suggestion: Why not try Toffee-Coffee Shortbread instead of Chocolate-Coffee Shortbread? So while going through my cupboards looking for the chocolate chips what do you think I found? That's right! A whole bag of toffee chips! That is the story of how my second batch became Toffee-Coffee Shortbread Cookies.
Espresso-Chocolate Shortbread Cookies
makes 42 cookies
1 tbsp instant espresso powder
1 tbsp boiling water
2 x 8oz sticks unsalted butter, at room temperature
2/3 cup confectioners' sugar
1/2 tsp pure vanilla extract
2 cups all-purpose flour
4oz bitter sweet chocolate, finely chopped, or 3/4 cup store-bought mini chocolate chips (or toffee bits!)
Confectioners' sugar, for dusting (optional)
1. Dissolve the espresso in the boiling water, and set aside to cool to tepid.
2. Working with a stand mixer, preferably fitted with a paddle attachment, or with a hand mixer in a large bowl, beat the butter and confectioners' sugar together on medium speed for about 3 minutes, until the mixture is very smooth. Beat in the vanilla and espresso, then reduce the mixer speed to low and add the flour, mixing only until it disappears into the dough. Don't work the dough much once the flour is incorporated. Fold in the chopped chocolate with a sturdy rubber spatula.
3. Using the spatula, transfer the soft, sticky dough to a gallon-size zipper-lock plastic bag. Put the bag on a flat surface, leaving the top open, and roll the dough into a 9 x 10 1/2 inch rectangle that's 1/4 inch thick. As you roll, turn the bag occasionally and lift teh plastic from teh dough so it doesn't cause creases. When you get the right size and thickness, seal the bag, pressing out as much air as possible, and refrigerate the dough for at least 2 hours, or for up to 2 days.
4. Position the racks to divide the oven into thirds and preheat the oven to 325 degrees F. Line two baking sheets with parchment or silicone mats.
5. Put the plastic bag on a cutting board and slit it open. Turn the firm dough out onto the board (discard the bag) and, using a ruler as a guide adn a sharp knife, cut the dough into 1 1/2 inch squares. Transfer the squares to the baking sheets and carefully prick each one twice with a fork, gently pushing the tines through the cookies until they hit the sheet.
6. Bake for 18-20 minutes, rotating hte sheets from top to bottom and front ot back at the midway point. The shortbreads will be pale - they shouldn't take on much color. Transfer the cookies to the rack.
7. If you'd like, dust the cookies with confectioners' sugar while they are still hot. Cool the cookies to room temperature before serving.
And there you go! Christmas presents for all! I baked mine a couple minutes too long. The next batch I will do for only 15 minutes (in a convection oven). I really really really love the concept of rolling the dough in the Ziplock bag. The dough gets so firm, that you can cut it out of the bag and cut off as many squares as you need for that day, and then transfer the rest of it into a new bag and put it back in the fridge! I still have 1/2 of each batch in the fridge to bake again tonight! And let me tell you... the smell that goes through the house when these babies are in the oven is absolutely heavenly! They should make candles that smell like these cookies!
I love you so much. I can't wait for our weekend coming up. Good luck with all your lesson planning and ... report cards? Is it that time of year or am I making it up?
All My Love,
Tuesday, May 24, 2011
Yummy In My Tummy Dark Chocolate and Raspberry Scones
Dearest Jess,
The 30 Day Hot Yoga Challenge is complete. I put on my bathing suit the day after I completed this crazy challenge and... it was too big! What an awesome feeling. So needless to say, things are going great.
We had a party to celebrate this achievement (the 30 Day Challenge... not the bathing suit being too big) and I was supposed to make and bring a Greek Salad. When I went to make it, I decided it was a little boring for what I wanted. Please don't make the mistake of thinking that I do not enjoy Greek Salad. You know it's one of my favorite things (especially with chicken!) I just was not feeling it for this particular day/event. Instead: Dark Chocolate and Raspberry Scones happened.
I am so excited to share this one with everyone. What a treat! When it is pared with a cup of piping hot tea (even iced tea would be sublime) it is magical.
The only suggestion I would make is to do a tiny bit less chocolate and a tiny bit more frozen raspberries! Mmmmm. Enjoy...
Raspberry Chocolate Tea Scones
2 cups all-purpose flour
2 teaspoons baking powder
2 tablespoons sugar
4 tablespoons unsalted butter, chilled and chopped into small pieces
1 cup miniature chocolate chips or finely chopped chocolate
1 cup frozen raspberries, chopped (keep frozen until you’re ready to add them to the dough)
3/4 cup heavy cream
1 egg, separated
1 teaspoon vanilla extract
1. Preheat oven to 425 degrees and line a baking sheet with parchment or a silicone baking mat.
2. In a large bowl, whisk together the flour, baking powder, and sugar. Add the chopped cold butter and rub with your fingers into the flour until the bits of butter are roughly the size of peas. Stir in the chocolate chips/chunks.
3. Separate the egg; reserve the white for later use (you’ll use it to brush on the tops of the scones before baking.) In a separate bowl or liquid measuring cup, whisk together the cream, egg yolk, and vanilla extract.
4. Add the chopped frozen raspberries to the flour mixture. Pour in the cream, and using light, quick strokes, stir with a fork until just moistened (there may still be some flour on the bottom of the bowl.) Use your hands to gather the dough into a ball and knead it lightly a few times, just to gather it together. Don’t worry if there’s still a little flour remaining on the bottom of the bowl.
5. Turn the dough out onto a lightly floured work surface and divide into two balls. Gently flatten each ball into a 1-inch high disk, and cut each disk into 6 wedges (for 12 scones total.) Place on baking sheet and brush the tops with the reserved egg white; sprinkle with sugar.
6. Bake for about 12-15 minutes or until the tops are golden brown and scones are cooked through.
I hope all is going well with your applications. As you already know you are in my prayers.
I am learning so much. I never realized (until the last 2 years or so) how much I truly enjoy purposefully learning. In a lot of ways school distracted me from it. Don't get me wrong, I hold great value in education, and know how privileged I am to have had the opportunity to go to university. I just have been enjoying the extra 'brain room' and time to do so. Discussions are more interesting and even going into certain topics, I am beginning to feel more confident in my reasons for believing things the way that I do.
I am thankful to have you as my friend. So thankful. I'm not sure you fully realize how thankful.
So much Love,
Sally
The 30 Day Hot Yoga Challenge is complete. I put on my bathing suit the day after I completed this crazy challenge and... it was too big! What an awesome feeling. So needless to say, things are going great.
We had a party to celebrate this achievement (the 30 Day Challenge... not the bathing suit being too big) and I was supposed to make and bring a Greek Salad. When I went to make it, I decided it was a little boring for what I wanted. Please don't make the mistake of thinking that I do not enjoy Greek Salad. You know it's one of my favorite things (especially with chicken!) I just was not feeling it for this particular day/event. Instead: Dark Chocolate and Raspberry Scones happened.
I am so excited to share this one with everyone. What a treat! When it is pared with a cup of piping hot tea (even iced tea would be sublime) it is magical.
The only suggestion I would make is to do a tiny bit less chocolate and a tiny bit more frozen raspberries! Mmmmm. Enjoy...
Raspberry Chocolate Tea Scones
2 cups all-purpose flour
2 teaspoons baking powder
2 tablespoons sugar
4 tablespoons unsalted butter, chilled and chopped into small pieces
1 cup miniature chocolate chips or finely chopped chocolate
1 cup frozen raspberries, chopped (keep frozen until you’re ready to add them to the dough)
3/4 cup heavy cream
1 egg, separated
1 teaspoon vanilla extract
1. Preheat oven to 425 degrees and line a baking sheet with parchment or a silicone baking mat.
2. In a large bowl, whisk together the flour, baking powder, and sugar. Add the chopped cold butter and rub with your fingers into the flour until the bits of butter are roughly the size of peas. Stir in the chocolate chips/chunks.
3. Separate the egg; reserve the white for later use (you’ll use it to brush on the tops of the scones before baking.) In a separate bowl or liquid measuring cup, whisk together the cream, egg yolk, and vanilla extract.
4. Add the chopped frozen raspberries to the flour mixture. Pour in the cream, and using light, quick strokes, stir with a fork until just moistened (there may still be some flour on the bottom of the bowl.) Use your hands to gather the dough into a ball and knead it lightly a few times, just to gather it together. Don’t worry if there’s still a little flour remaining on the bottom of the bowl.
5. Turn the dough out onto a lightly floured work surface and divide into two balls. Gently flatten each ball into a 1-inch high disk, and cut each disk into 6 wedges (for 12 scones total.) Place on baking sheet and brush the tops with the reserved egg white; sprinkle with sugar.
6. Bake for about 12-15 minutes or until the tops are golden brown and scones are cooked through.
I hope all is going well with your applications. As you already know you are in my prayers.
I am learning so much. I never realized (until the last 2 years or so) how much I truly enjoy purposefully learning. In a lot of ways school distracted me from it. Don't get me wrong, I hold great value in education, and know how privileged I am to have had the opportunity to go to university. I just have been enjoying the extra 'brain room' and time to do so. Discussions are more interesting and even going into certain topics, I am beginning to feel more confident in my reasons for believing things the way that I do.
I am thankful to have you as my friend. So thankful. I'm not sure you fully realize how thankful.
So much Love,
Sally
Tuesday, April 12, 2011
Stuffed Mushrooms
I found these mushrooms on Handle the Heat, and she found them here. These little tasty treats have been on my 'to make' list for quite some time. When my Mom's birthday rolled around, it seemed to be the perfect occasion. They are hearty, a little spicy, and very easy to make. Instead of the Marsala, I used some red wine that I had lying around. It worked wonderfully. These were a big hit!
Sausage Stuffed Mushrooms
16 extra-large white mushrooms
5 tbsps good olive oil, divided
2 1/2 tbsps marsala wine or medium sherry
3/4 pound sweet Italian sausage, removed from the casings
6 scallions, white and green parts, minced
2 garlic cloves minced
2/3 cup panko crumbs
5 oz mascrapone cheese, preferably from Italy
1/3 cup freshly grated Parmesan
2 1/2 tbsps minced fresh parsley leaves
Salt and freshly ground black pepper
1. Preheat the oven to 325 degrees F.
2. Remove the stems from the mushrooms and chop them finely. Set aside. Place the mushroom caps in a shallow bowl and toss with 3 tablespoons of the olive oil and Marsala. Set aside.
3. Heat the remaining 2 tablespoons olive oil in a medium skillet over medium heat. Add the sausage, crumbling it with the back of a wooden spoon. Cook the sausage for 8 to 10 minutes, stirring frequently, until it's completely browned. Add the chopped mushroom stems and cook for 3 more minutes. Stir in the scallions and garlic and cook for another 2 to 3 minutes, stirring occasionally.
4. Add the panko crumbs, stirring to combine evenly with all the other ingredients. Finally, swirl in the mascarpone and continue cooking until the mascarpone has melted and made the sausage mixture creamy. Off the heat, stir in the Parmesan, parsley, and season with salt and pepper, to taste, Cool slightly.
5. Fill each mushroom generously with the sausage mixture. Arrange the mushrooms in a baking dish large enough to hold all the mushrooms in a snug single layer. Bake until the stuffing for 50 minutes, until the stuffing is browned and crusty.
I can't wait to see you! I hope all is going well, and you are finding lots of little adventures to keep things exciting.
I love you,
Sally
Thursday, March 31, 2011
Extraordinary Nachos
To My Lovely Jess,
I woke up this morning thinking it was Friday. I got to the office only to realize it is actually Thursday. Not the best start to the day, but it could be much worse.
I have signed up to do a 30 day hot yoga challenge at the studio I'm working at. It starts on April 21st and ends on the 20th of May (right before the long weekend and Jason and my One Year Anniversary!) So up until then I'm trying to get as much done as I can in order to be completely committed for those 30 days.
After my 90 minute yoga class last night, Jason picked me up and we went to his place to play some cards and eat. There was not much in terms of dinner food at his house, so we took a quick inventory of what we had to work with. We decided to get creative with nachos!
Now, firstly, I did not intend to make this a blog entry. But when we got them together, I looked at them and knew they were something special. Secondly, the smell of them broiling in the oven was surreal, and when we dug into them, we couldn't stop until they were all gone!
Tasty Nachos
Whole grain nachos (I wanted to use the gluten free ones from Costco ... Next time for sure.)
Marble Cheese
Broccoli, cut in small pieces and blanched
Hot Peppers (we used the ones that come in a jar)
Medium Salsa
Chili Powder
1. Layer as follows:
Chips, cheese, salsa, hot peppers, broccoli, a little more cheese. Sprinkle with Chili Powder.
2. Broil for 3-5 minutes.
3. Eat them all!
I hope you're doing well! I miss you as always. I am getting very excited for all the trees and grass to turn green, and so many fruits and vegetables to come into season. Have a wonderful weekend.
Love,
Sally
I woke up this morning thinking it was Friday. I got to the office only to realize it is actually Thursday. Not the best start to the day, but it could be much worse.
I have signed up to do a 30 day hot yoga challenge at the studio I'm working at. It starts on April 21st and ends on the 20th of May (right before the long weekend and Jason and my One Year Anniversary!) So up until then I'm trying to get as much done as I can in order to be completely committed for those 30 days.
After my 90 minute yoga class last night, Jason picked me up and we went to his place to play some cards and eat. There was not much in terms of dinner food at his house, so we took a quick inventory of what we had to work with. We decided to get creative with nachos!
Now, firstly, I did not intend to make this a blog entry. But when we got them together, I looked at them and knew they were something special. Secondly, the smell of them broiling in the oven was surreal, and when we dug into them, we couldn't stop until they were all gone!
Tasty Nachos
Whole grain nachos (I wanted to use the gluten free ones from Costco ... Next time for sure.)
Marble Cheese
Broccoli, cut in small pieces and blanched
Hot Peppers (we used the ones that come in a jar)
Medium Salsa
Chili Powder
1. Layer as follows:
Chips, cheese, salsa, hot peppers, broccoli, a little more cheese. Sprinkle with Chili Powder.
2. Broil for 3-5 minutes.
3. Eat them all!
I hope you're doing well! I miss you as always. I am getting very excited for all the trees and grass to turn green, and so many fruits and vegetables to come into season. Have a wonderful weekend.
Love,
Sally
Thursday, March 10, 2011
Travel Food
Dear Sally,
I can't remember if I told you that Jesse and I are going to Ohio this weekend but I'm telling you now :)
In preparation for the trip I thought I would do some baking. The boys requested White Chocolate Macadamia Nut cookies and I threw in some Reese's Pieces Cookies. I was also inspired by a recipe from Handle the Heat for soft pretzels and so I made little pretzel pieces and coated them in chocolate (and then some were rolled in Reese's Pieces).
Hopefully there will still be some treats left for our hosts after our 7 hour drive tonight but with two boys in the front of the truck and me sleeping in the back I highly doubt it!
I miss you so much but we will see each other soon! Hope you are staying warm and dry in this weather.
Love,
Jess
Reese's and White Chocolate Cookies
1 1/3 cups unsalted butter (room temperature)
2 eggs (room temperature)
1 cup white sugar
1 cup brown sugar
2 tsp vanilla
3 cups flour
3 tsp baking powder
1 tsp salt
1/2 cup white chocolate chips
1/3 cup macadamia nuts
1 cup Reece's Pieces
1. Combine butter, eggs, vanilla, and sugars in a mixing bowl. Slowly add flour,baking powder and salt mixture to the rest of the ingredients. Add the chocolate chips and nuts and mix. Bake at 350 for 10-12 minutes or until golden brown.
2. Let cool and enjoy! Add crushed Reece's Pieces for an interesting change.
Soft Pretzels
1 1/2 cups warm water
2 tablespoons light brown sugar
1 package active dry yeast
3 ounces unsalted butter, melted
2 1/2 teaspoons kosher salt
4 cups all-purpose flour vegetable oil
3 quarts water
3/4 cup baking soda
1 whole egg, beaten with 1 tablespoon cold water
coarse sea salt
1. Combine water, sugar, yeast, and butter in a bowl and mix until combined. Let sit for 5 minutes.
2. Add the salt and flour and mix with a dough hook on low speed until combined. Increase the speed to medium and continue kneading until the dough is smooth and begins to pull away from the side of the bowl, about 3 to 4 minutes. If the dough appears too wet, add additional flour, 1 tablespoon at a time. Remove the dough from the bowl, place on a flat surface and knead into a ball with your hands. Oil a large bowl with vegetable oil, add the dough and turn to coat with the oil. Cover with a clean towel or plastic wrap and place in a warm spot until the dough doubles in size, about 1 hour.
3. Preheat the oven to 425 degrees F. Bring the water to a boil in a small roasting pan over high heat and add the baking soda.
4. Remove the dough from the bowl and place on a flat surface. Divide the dough into 8 equal pieces, . Roll each piece into a long rope measuring 22 inches and shape. Cut the dough into one inch pieces to make the pretzel bites. Boil the pretzel bites in the water solution in batches, boiling no more than 15 bites at a time, for about 30 seconds. Remove with a large slotted spoon. Place boiled pretzel bites on a baking sheet that has been sprayed with cooking spray. Make sure they are not touching.
5. Brush the tops with the egg wash and season liberally with the salt. Place into the oven and bake for 15 to 18 minutes until golden brown. Remove to a baking rack and let rest 5 minutes before eating.
6. Melt 10 ounces of milk chocolate in a microwavable bowl and dip pretzel pieces. Roll in crushed Reese's Pieces for extra goodness.
Subscribe to:
Posts (Atom)